Setting up an email data feed with Power Automate
Power Automate can streamline workflows by automatically handling email attachments and saving them to OneDrive
In this guide, we’ll walk through a process that extracts CSV files from incoming emails, creates a timestamped folder, and stores the files within a SharePoint Site’s associated OneDrive
What is Power Automate?
Power Automate is a cloud-based tool from Microsoft that automates workflows between apps and services, enabling us to sync files, receive notifications, and manage data without manual intervention
As part of the Microsoft 365 ecosystem, it integrates seamlessly with tools like OneDrive, SharePoint, Outlook, and Excel
Step-by-step: Creating a Power Automate workflow
Now let’s jump in and create our Power Automate workflow in the platform
- Log in to Power Automate:
- Navigate to Power Automate and log in with your Microsoft 365 credentials
- Create a new flow:
- On the left-hand sidebar, click on “Create”.
- You’ll be presented with several options. Select “Automated cloud flow” since we’re triggering the workflow when a new email arrives
- Name your flow and choose a trigger:
- In the dialog box that appears, give your flow a name, such as “Move CSV Attachments to OneDrive”
- Under Choose your flow’s trigger, search for the trigger titled “When a new email arrives (V3)”
- Click “Create” to proceed
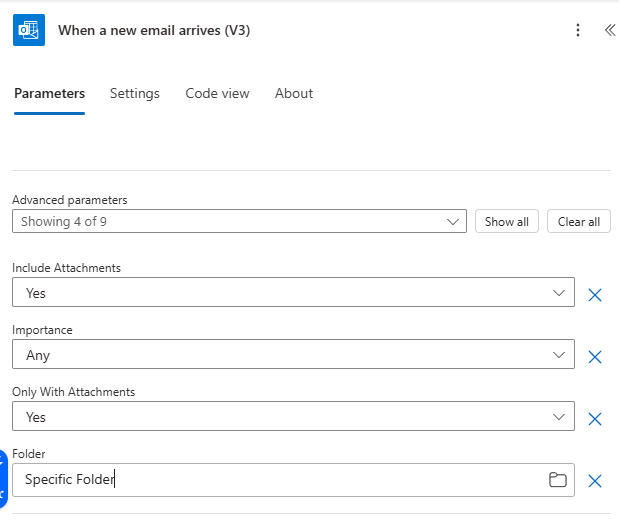
- Set email filter conditions (optional):
- Once the trigger is added, you can narrow down the emails that trigger this flow:
- In the trigger step, you can add filters such as Inbox, From address, Subject line, specific Folder, or Has Attachments to refine the emails that the workflow will act upon
- For instance, you might specify a Folder to only trigger on emails that land in some specific folder
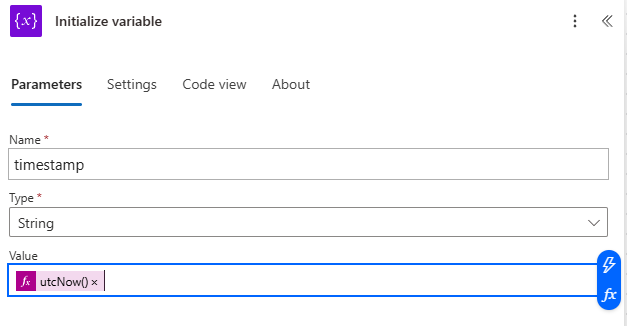
- Initialize “timestamp” variable:
- Click “New Step” and search for “Initialize variable”
- Create a variable named “timestamp”
- Set the “Type” to “String”, and under “Value”, use the “Expression” option (lightning bolt icon) to generate a dynamic timestamp:
- Use the expression
utcNow()to capture the current date and time - This ensures the timestamp is generated once and can be reused consistently throughout the workflow
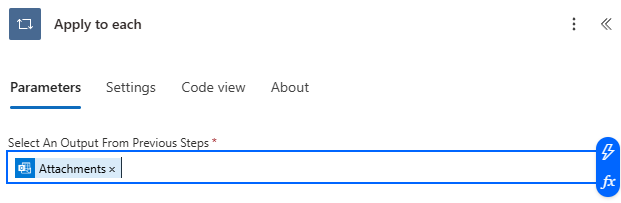
- Add an “Apply to each” loop:
- After initializing the variables, click “New Step” and search for “Apply to each”
- Select “Apply to each”, and in the “Select an output” field, select “Attachments” from the dynamic content pane (this will loop over all attachments in the incoming email)
- Create a timestamped folder in OneDrive:
- Inside the “Apply to each” loop, click “New Step” and search for “Create new folder 2”
- Select the OneDrive associated with your target SharePoint Site
- Set the folder name to the
timestampvariable, ensuring it persists throughout the flow for all attachments - (optional) Specify a subfolder in “Folder Path” to nest it
somewhere/else/{timestamp}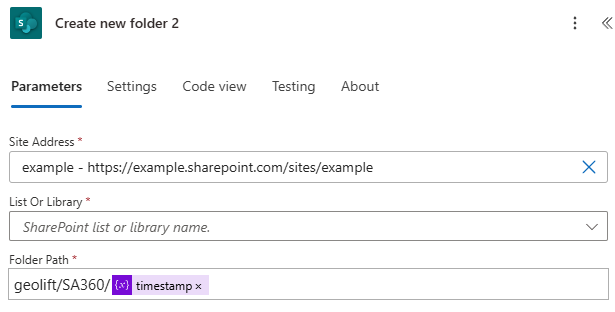
- Move email attachments to the new folder:
- After creating the folder, click “Add an Action” and search for “Create file 2”
- Point it to the folder you just created in OneDrive
- For the file name, select “Attachment Name” from the dynamic content, and for the file content, choose “Attachment Content”
- This will save each attachment into the newly created timestamped folder
- Save the flow:
- Once you’ve completed these steps, click “Save”
- Test the flow by sending an email with attachments. The attachments will now be moved into a single folder based on the static timestamp from when the flow was triggered
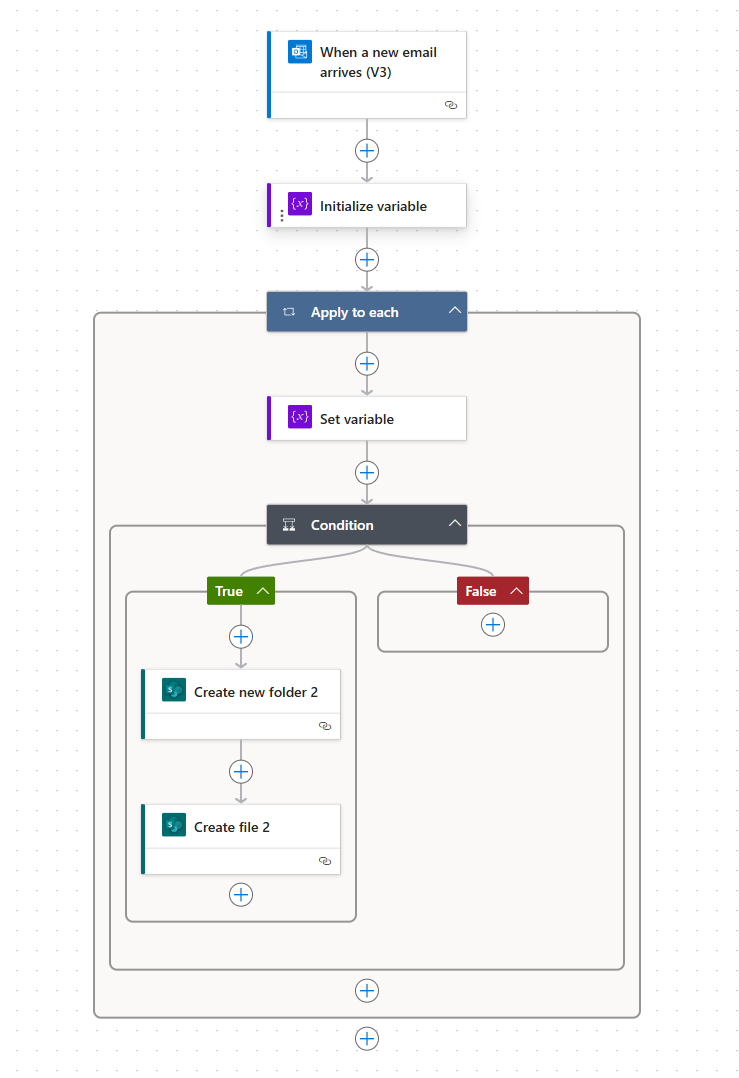
Example of a complete workflow: